MAKING & FITTING A PORTHOLE WINDOW.
| ROLLIN SANCTUARY's - Task: Windows | |
| Write up for their project ROLLIN' SANCTUARY | Status: 
|
Click on images to enlarge - full task gallery at bottom of page
I had this 'notion' of having a porthole window in the van.....probaly due to my interest in the 1970's Custom van craze.? I know they can still be bought 'ready-made to fit' if you look in the right places, but I wanted to continue work on the van as far as possible using recycled materials....Not only because when you do it this way it costs nothing but time, but because [by this stage]it had become a bit of a proud achievement to have done all the work I have, for the price of some screws & no-nails etc: AND I had re-used some of the world's junk. {I'm a secret tree-hugger really. LOL] So after a lot of head scratchin', chin stroking, doodles, sketches, and "what if's",...I locked-onto the idea of using an old plastic sign I found in a skip, and some perspex I had in my garage for years. So many years in fact, that I can't recall where that came from.? First thing I had to do was check how big it could be, which was determined by the space between 2 of the vans original upright wall supports in the area I wanted the porthole. I wanted the original Ford strengtheners to be as intended by Ford for peace of mind more than anything else. Once I'd worked out the maximum size it could be 'in that area', I cut a circle from the yellow tinted transparent perspex, which I could then use as a pattern to determine what size the retaining ring had to be. [obviously, the outter ring has to overlap the perspex to hold it in position] This is where the plastic sign comes in. I cut the outter ring shape from the old plastic sign using a jig-saw [woodwork blade] and removed all the parts of the stickers that were left sticking to it. I filed it, used emery cloth on it, sanded it, and scraped it with a stanley knife, until eventualy, it was pretty close to a proper circle. Then on the inside of the outter ring, I fitted another similar ring which allowed the perspex to sit inside it, face to face with the outter ring, with clear sealer between them. A bit like a giant washer around the perspex if you like? Are you following this? Keep up at the back. LOL.
When the sealer was dry, the whole assembly could be picked up in one piece, ready to add the gasket.
I was lucky, I had a sheet of cork gasket already, but I'm pretty sure a cork tile [as fitted in houses] would do the job.....I cut the cork to size and put a decent coating of clear sealer on the inside of the ring assembly, then placed the gasket on it with a piece of ply'and a good weight on top of that, to make sure the sealer spread out well, and hopefully to prevent air bubbles causing a gap in the 'seal'.
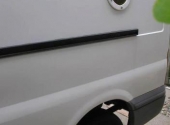
The next stage was obviously to cut the hole in the van for the porthole to go in. Making the first jig-saw access drill hole in the side of your "perfectly good van side" is a nerve racking experience I can tell you. But it's a case of 'grit your teeth and go for it'. You'll see photo's of the cutting of the hole in my project gallery, but before you attempt it, a word of advice.....Make sure you have 2 or 3 spare metal cutting blades for your jig-saw, or you'll end up doing it with a hack-saw blade wrapped in rag [for a handle] and cursing sweating and losing knuckle skin, when the ONE metal blade you have snaps.! I'm sure the rest of fitting the porthole is pretty obvious, but I'll carry-on explaining as basicly as possible. I alligned it with the hole in the side of the van, and drilled the bolt holes to mount it. The final job before actualy bolting it on was to add clear sealer to the cork gasket where it presses against the van wall. My biggest 'cringe factor' besides begining to cut the hole was.....Will it leak ? But I needn't have worried because the combination of cork and sealer has done the job.I water-tested it myself when the sealer had time to dry, and soon after I fitted it we had torrential rain. I think the best way to check for any signs of a leak is to use a piece of toilet tissue around your work. It's such a 'light' tissue, it will pick up the slightest bit of dampness. The bolts I used to mount the porthole are stainless steel. I already had these in my garage, but I don't think they are expensive to buy? So I have a freebie porthole window, with a perspex 'glass', [won't ever smash] plastic mounting rings [won't ever rot/deteriorate]and stainless steel nuts n bolts, which obviously won't ever rust or rot away over the years.


