Building of The Beast ...
ithody's Project


Status:
Completed


Click on images to enlarge - full project gallery at bottom of page
Always fancied doing a camper conversion so finally took the plunge with a 2002 Sprinter LWB Hi-Top from scratch. Christened the van "The Beast" as that's how it felt sometimes when trying to do jobs like carpeting the ceiling/walls single handed. It took about six months to complete and loved every (well, nearly) moment of it. Now just enjoying getting out and about in her, doing a bit of glamping!
Let me know what you think.
Cheers, Ian
Project Task Write-ups:
-
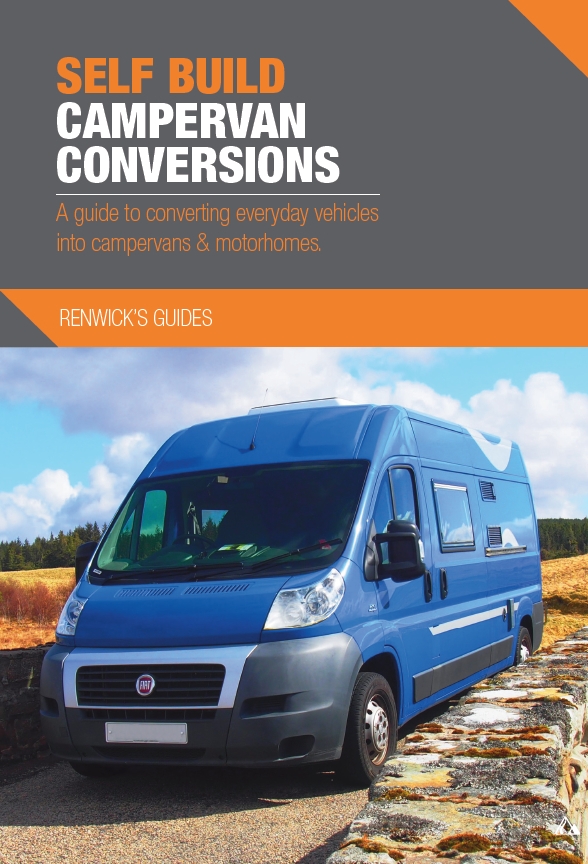
Base Vehicle
Ripped everything out to start with a blank shell. Got the basic van electrics sorted out. Fixed the electric windows and added central locking.
More Details -
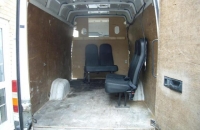
Project Plan
Every project has to start with a plan. And this was after many, many iterations.
More Details -
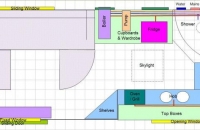
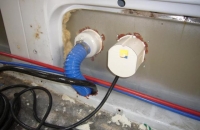
Wiring & Electrics
Mains 240v hookup feeding consumer unit housed in the bottom of the wardrobe. 2 x 240v sockets in kitchen. 1 x 240v socket on control panel. Control panel provides 12v power to water boiler, pum...
More Details -
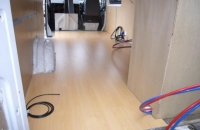
Flooring
Used UniClic laminate flooring with additional 7mm of double skinned foil bubble insulation underneath.
More Details -
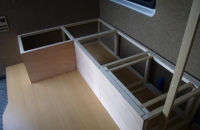
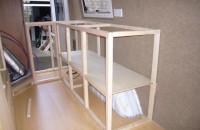
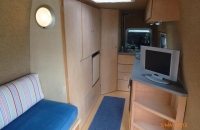
Bed System
In normal setup the framework provides an 'L' shaped seating area with hinged lids for storage of bedding and other stuff within. One end of the framework pulls out to provide the support for the h...
More Details -
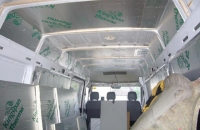
Insulation
Used 50mm Celotex sheets on the walls/doors and 25mm Celotex on the roof. Filled inaccessible crevices with rockwool that I could readily push into tight spaces. The van has proved pretty to...
More Details -
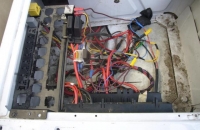
Charging System
Installed leisure battery under middle passenger seat box. Wired in split charge relay, fridge (12v) relay, and isolation relay(when in transit) under driver's seat. Fitted ZIG X70 charger ...
More Details -
Kitchen
Having come so far ... decided not to scrimp on second hand flea-bay items and went for brand new matching Spinflo oven/grill, hob and sink units. Definitely the right decision if you want a decent...
More Details -
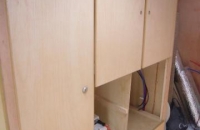
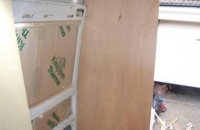
Units & Furniture
Made the mistake of buying 12mm faced ply rather than the recommended 15mm faced ply. Which meant all the door catches had to be packed out 3mm from behind to ensure they fitted correctly. Won't ma...
More Details -
Water System
Installed a 46 litre fresh water tank (from CAK Tanks) under the van chassis. The external filler point was mounted next to the mains hookup point. Hot water is provided by a Propex Malaga E boi...
More Details -
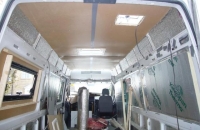
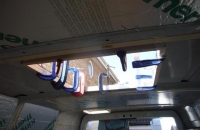
Panels & Lining
Decided on using hardboard rather than plywood for lining the van to better cope with the curves on vehicle, particularly at the roof. Used a cheap ribbed carpet for walls, doors and ceiling us...
More Details -

Windows
Used a combination of jigsaw, angle grinder and drill nibbler to cut the window apertures. (The nibbler was perfect when you have a panel skin as a guide.) Obtained bonded windows (fixed and sl...
More Details -
Roof
Fitted a 50cm x 50cm Fiamma skylight, that opens either fully or just half in any direction, for the main living area. Then a Fiamma 28cm x 28cm fan extractor skylight for the shower cubicle. The ...
More Details -
Bathrooms
Agonised for ages on whether to put a shower in at all given the space needed. But decided it was a must for wild camping. Found an unusual 5-sided shower tray that made good use of available space...
More Details -
Lighting
All lighting is 12v. LED strips for the kitchen area, striplight in the shower, diffused lighting for the living area, small spotlights for a quick read in bed.
More Details -
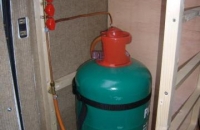
Gas
Installed a standard patio heater sized propane cylinder in a cupboard behind the kitchen area, accessible from the rear doors. Should last for ages! Fitted a set of isolation valves to independent...
More Details -

2nd Battery
Fitted leisure battery in middle passenger seat box and wired it into the split charge system installed under the driver's seat.
More Details
Project Image Gallery (click to enlarge):