How To:

Campervan Carpet Lining

READ MORE IN NEW CONVERSIONS BOOK

Find lots more details in the NEW Self Build Campervan Conversions book

A carpet lined campervan panel and wheel arch

1. Introduction - Carpeting a Campervan

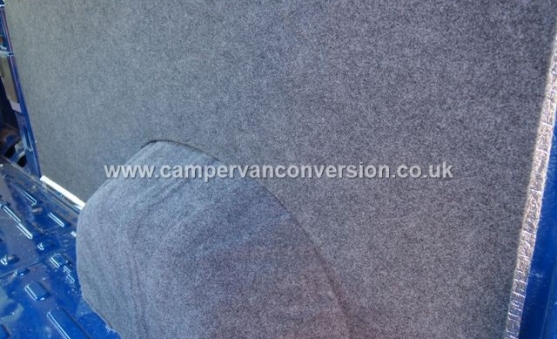
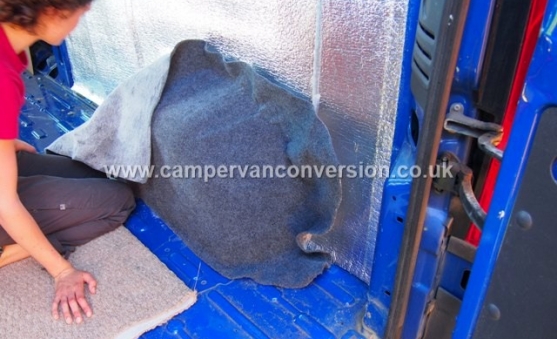
Why line the interior of your van with carpet?  Well, for many converters once you’ve finished insulating the vehicle, carpeting is the obvious next step for a van conversion and it's one of the main things that will help create a nice professional finish.  But how much of your van do you carpet, and how do you do it well?  Here we’re going to take a closer look at carpeting the walls and ceiling of your pride and joy.

Let's face it, sitting in a metallic shiny interior, or lying in bed next to wool fibre insulation, plastic sheets, and bare panels isn’t really all that pleasant, especially after you’ve been hiding from the rain in your van for a couple of days... One advantage of carpeting the interior of your van is that it makes  it so much cosier and pleasant to sit and relax in, while another advantage is that the carpet ensures that all metal, on which condensation can form, is fully covered and thereby helps to keep your van that little bit drier.

Measuring up carpet for a plywood panel

2. Getting Started on Carpeting your Van

So, where to start?

First question: What sort of carpet should be used for lining a van?

Due to all the corners, awkward angles and difficult, rounded shapes, such as wheel arches, it’s sensible to use four way stretch auto-grade carpet so that you can fit it round the difficult shapes thus avoiding unnecessary joins or air pockets all over the place.

Measure the dimensions of the inside of your van, add a bit for the fiddly corners and some inevitable waste (due to all the odd shaped areas you always find in campervans) and that should give you approximately the amount of carpet you need to line your campervan. Don’t forget to think about the colour you want for your van interior before you buy as well!

Useful tools for measuring and cutting out the carpet

3. Fitting the Carpet

So... you've chosen the colour, and your lovely new roll of flexi lining carpet has been delivered... your van is already insulated, but now you're left wondering quite what to do with this huge roll of carpet sat on the floor of your van!

First things first, if you have decided to use different colours make sure you know which is going where.  Then start with the parts that will sit behind the edges of panels - something like a wheel arch or with the panels themselves, making sure to mark where screws need to be. Do one thing at a time, - measure then cut.  It’s usually best to add a good margin onto the area being measured so that you definitely have enough to cover it, and for the panels you want to leave enough round the edges to be able to fold the carpet over and fix it on the back for neatness.

Glueing the carpet to the wheel arch

4. Attaching the Carpet

So, you’ve cut out your first piece, and now you need to attach the carpet to something, somehow. We recommend using high temperature contact adhesive and attaching the carpet either directly to the insulation, for example over the wheel arch, or onto the wooden panels.  It's very important to use good quality high temperature adhesive as vehicles can get very hot - if you use the wrong adhesive, you may well arrive back at your campervan on a hot day to find carpet and insulation peeling off the walls.  Following the instructions on the spray adhesive, attach the carpet to your chosen surface remembering that if it doesn’t seem to be attaching exactly where you want it you can carefully pull the carpet away and reattach in a better position.

If carpeting a wheel arch it’s best to start in the middle and work your way out, one side at a time.  Carpeting plywood panels works best if you start at one end. You might want some help with the bigger surfaces, as it always looks better to do things like panels in one piece but a large bit of carpet covered in contact adhesive is somewhat unwieldy when attempting this alone!

FAQs for carpeting a campervan

5. FAQs

Q: Which side of the carpet should be facing outwards?

A: The slightly harder side is the one which you should use to attach the carpet to the van; the softer side will then be facing outwards and be a bit nicer as a wall covering in your van.

Q: How easy is it to get the carpeting to look professional?

A: Really easy, just take your time and remember that the carpet can be gently pulled away from the surface to which you are sticking it if you’re getting unwanted bumps!