Tin Tent 2
steamydave's Project


Status:
Complete (more or less!)


Click on images to enlarge - full project gallery at bottom of page
Hi, the project for “Tin Tent 2” was to create a single berth (or 2 berth it you are very narrow) campervan inside a Suzuki Carry 2005 van.
Because of the van size (especially width), just about the minimum was possible – in fact, quite cosy.
A few of the initial requirements are listed here...
* Under 2m high to allow access to normal car parks
* Seating/bed available without lots of fiddling with converting seats etc
* Built to DVLA standards * (I’ll talk more about this later grrrrhhh!)
* Cheap to run, and “reasonable looking” – it’s my only vehicle, so has to look OK on the drive and at work! (no converted busses for me – yet).
Project Task Write-ups:
-
Base Vehicle
The van had already been partially ply lined. Some of which was re-used, some was replaced.
More Details -
Panels & Lining
Vehicle carpet lining was put on just about everything. It hides the dinks and scratches from the van’s previous life, adds a warm feel when resting against the walls, and some insulation. A w...
More Details -
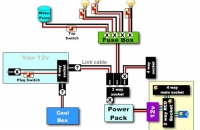
2nd Battery
I wanted a leisure battery, but I already had a Halfords all-in-one battery/air pump/torch/240v unit. So I decided to use that unit as my leisure battery. The unit can be charged via the mains a...
More Details -
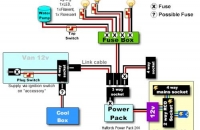
Wiring & Electrics
It's a little unconventional as it doesn't use the usual split-charge relay and leisure battery. The battery is a Halfords Power Pack. It has a 20ah 12v battery, inverter, 250psi compressor, jump ...
More Details -
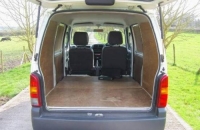
Flooring
The Suzuki Carry comes with 2 sections of floor that creates a flat load space. The first section originally hinged to allow taller items to be carried between the doors. The section easily (!) unb...
More Details -
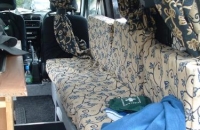
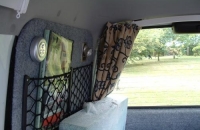
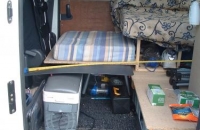
Bed System
The seats have an additional "lid" to the box section. This second lid is hinged so it opens out to make the bed wider. A supporting “leg/support” rests against the seats and can simply be plac...
More Details -
Lighting
The van has lots of lights – I bought several different types as I wasn’t sure which was best – I ended up using them all!!! 1 fluorescent lamp over the sink/cooker – good bright light 1 ...
More Details -
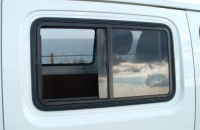
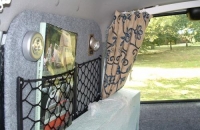
Windows
The windows were installed by a local window specialist. There are already frames for the Carry. One side opens to allow a draft through in summer time. In addition to the windows, I had a sunro...
More Details -

Units & Furniture
The cupboards and storage areas are basically built as a frame. The faces of the units were initially built using cheap chipboard. This was used to work out where doors could/should be, allowing fo...
More Details -
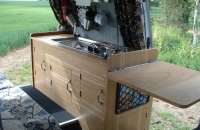
Kitchen
The kitchen consists of a Smev 911 combined double hob and sink. The unit can come with the sink on the right or the left. I decided I wanted the kettle nearer to the main sitting position rather t...
More Details -

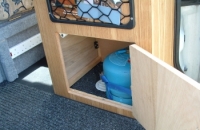
Water System
The water for the sink tap comes from a submersible pump in a 10 Litre water tank housed under the bonnet. The tap has a switch built-in which activates the pump when the tap is opened.
More Details -
Gas
The camping Gaz cylinder is strapped into its own locker at the base of the main cupboard. This area has ventilation through the floor - just in case!!!
More Details -
Miscellaneous
I was wondering if the space under the back seat of the van was really worth having or not. Its not very high so nothing much can be stored under there – or “can” it?!!!
More Details -
Project Plan
There were a few things I wanted from the van as a project: A single berth (or cosy 2 berth) day/camper van that would be my only vehicle so had to be cheap to run, and not look too out of place...
More Details
Project Image Gallery (click to enlarge):